Pickled okra is a delightful and versatile treat that combines the crisp texture of fresh okra with tangy, savoury flavours. Whether you’re a pickling enthusiast or trying it for the first time, pickled okra is a perfect addition to any pantry. It’s not just a snack—this Southern staple can elevate a charcuterie board, complement sandwiches, or add a zesty touch to your favourite recipes.
What makes pickled okra so unique? It’s incredibly easy to prepare, customizable with various spices and lasts for months when stored properly. From classic dill pickling to creative spicy variations, a version suits every palate.
In this post, you’ll learn how to make perfect pickled okra at home with a step-by-step recipe, tips for maintaining crispness, creative variations to try, and answers to common questions. Let’s dive into the world of pickling and create a jar of tangy, flavorful goodness!
Ingredients You’ll Need for Pickled Okra
Fresh Okra
- Opt for young, tender okra pods that are firm and free of blemishes. Smaller pods are ideal for pickling as they maintain their crisp texture.
Vinegar
- Use white vinegar for a clean, tangy flavour or apple cider vinegar for a slightly sweeter, more robust taste. Both work well to create a balanced brine.
Pickling Spices
- Incorporate classic spices like dill seeds, mustard seeds, and black peppercorns to give your pickled okra its signature flavour profile.
Flavor Enhancers
- Add garlic cloves for a savoury kick, red pepper flakes for heat, and fresh dill for a bright, herbaceous touch. These ingredients take the flavour to the next level.
Brine Components
- Combine water, salt, and sugar to create a balanced brine that preserves the okra while enhancing its flavour. Adjust the salt-to-sugar ratio to suit your taste preferences.
Pro Tip
Always use high-quality vinegar to achieve a well-rounded flavour. The vinegar type can significantly influence your pickled okra’s final taste.
Step-by-Step Instructions for Making Pickled Okra
Prepare the Okra
- Wash the okra pods thoroughly under cold water to remove any dirt.
- Trim the stems slightly, and be careful not to cut into the pods to prevent the okra from becoming slimy during pickling.
Make the Brine
- In a saucepan, combine vinegar and water with salt and sugar in equal parts.
- Warm the mixture over medium heat, stirring until the sugar and salt are fully dissolved.
- Bring the brine to a gentle simmer, then remove from heat.
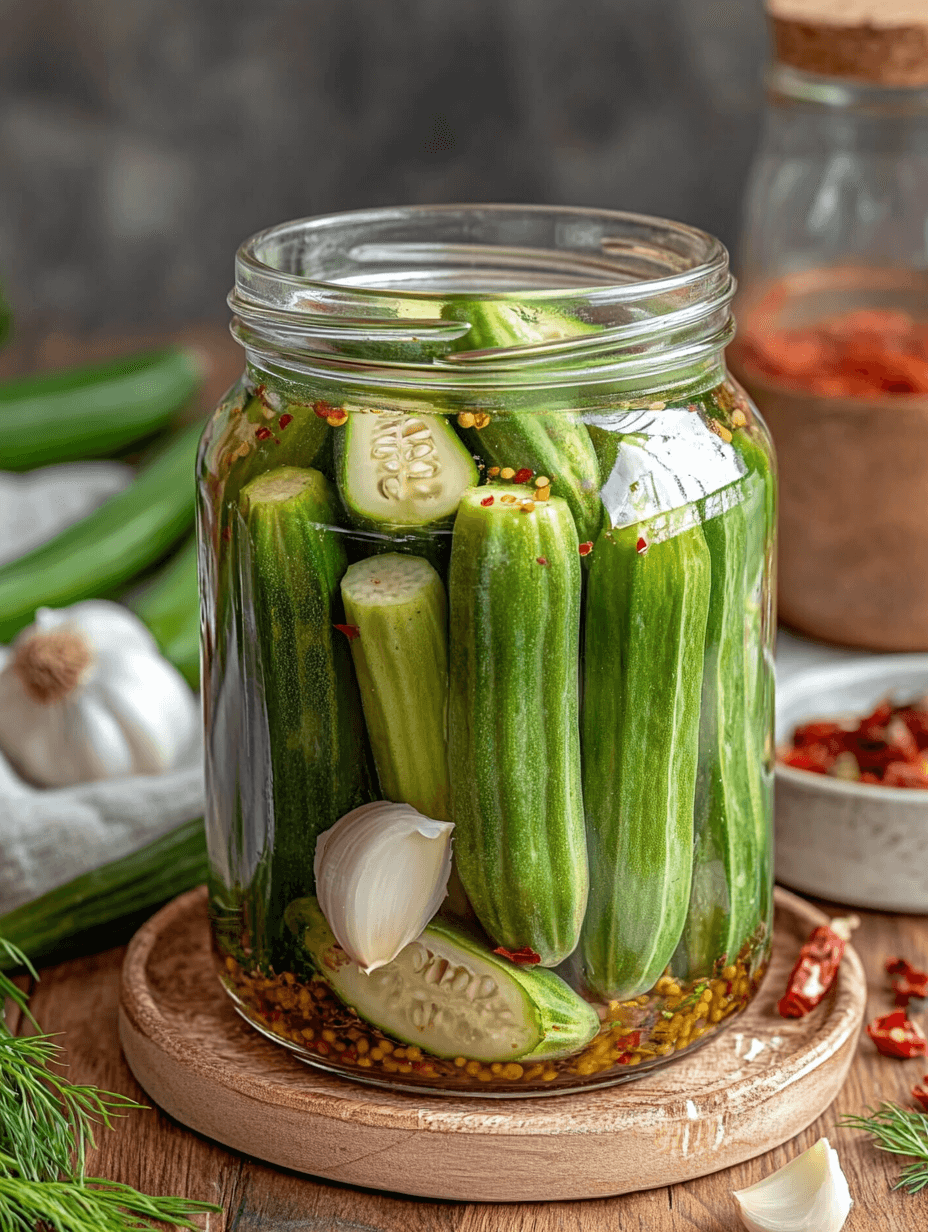
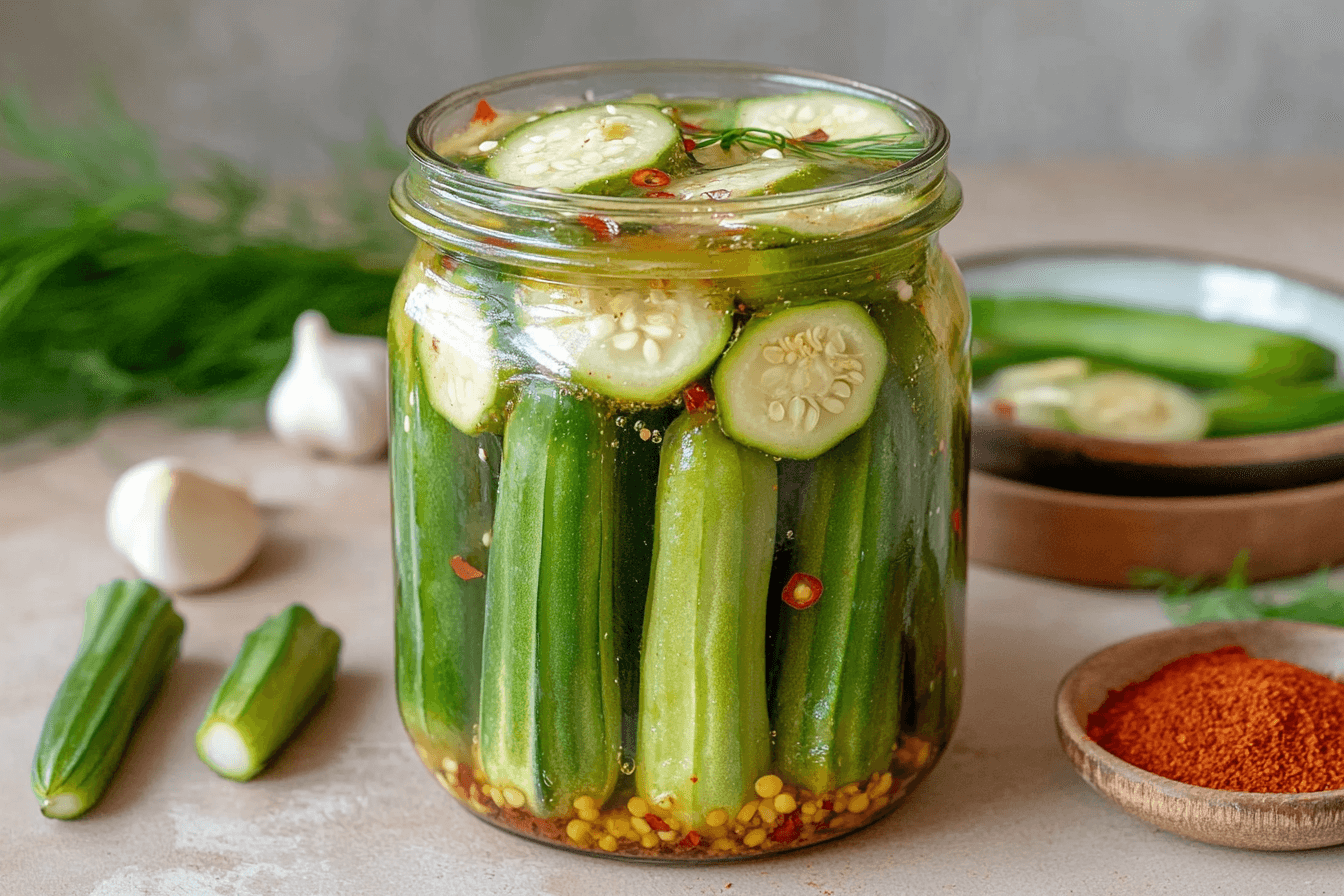
Pack the Jars
- Sterilize mason jars by boiling them in water for 10 minutes or running them through the dishwasher in the hottest setting.
- Tightly pack the okra pods upright in the jars, adding garlic cloves, dill, mustard seeds, black peppercorns, and red pepper flakes as you go.
Add the Brine
- Carefully pour the hot brine over the okra, ensuring that all pods are fully submerged.
- Use a clean utensil to release air bubbles by gently pressing the okra.
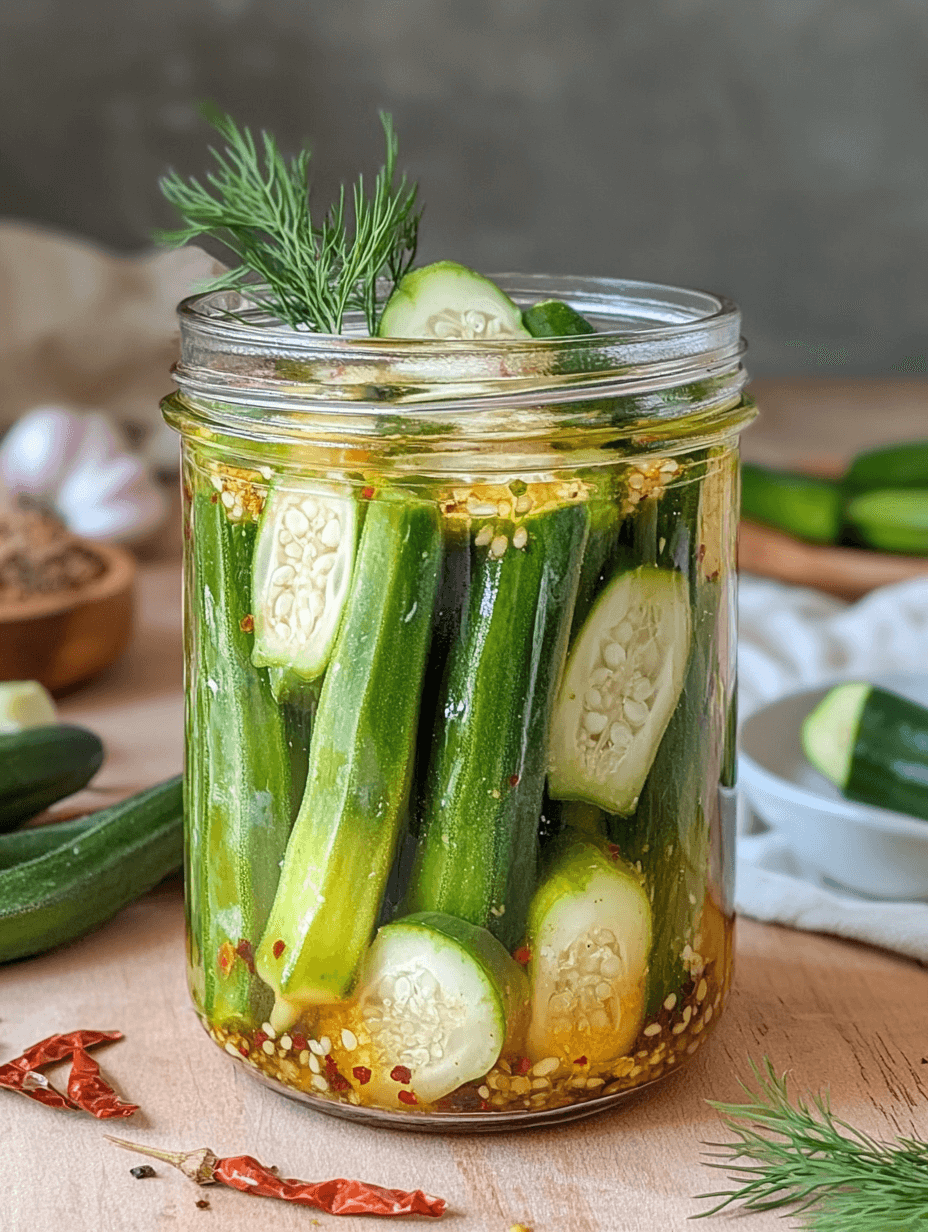
Seal and Store
- Wipe the rims of the jars clean, then secure the lids tightly.
- For refrigerator pickles, allow the jars to cool and refrigerate for at least 24 hours before enjoying.
- Process the jars in a boiling water bath for 10 minutes for shelf-stable storage.
Pro Tip
Leave about 1/2 inch of air space at the top of each jar. This “headspace” ensures a proper vacuum seal during processing and prevents the brine from spilling.
Tips for Crisp and Flavorful Pickled Okra
Choose the Best Okra
- Opt for young, firm, and unblemished okra pods for a satisfying crunch and better brine absorption.
- Avoid overripe or larger pods, as they can be challenging, woody, and less enjoyable to eat. Inspect the pods for any signs of discolouration or soft spots before using.
Avoid Sliminess
- Trim the stems carefully without cutting into the pod itself to prevent the release of the mucilage, which can lead to sliminess.
- To preserve the okra’s crisp texture, use a cold brine or allow the hot brine to cool slightly before pouring it over it. Keeping the pods intact also helps maintain their structural integrity.
Experiment with Spices
- Adjust red pepper flakes to suit your heat tolerance, creating a batch that’s either mild or delightfully spicy.
- Add mustard, coriander, or celery seeds to enhance the brine’s flavour for an aromatic and tangy profile.
- Try fresh dill sprigs, garlic cloves, or a slice of lemon to elevate the flavour complexity and add a fresh, zesty kick.
Pro Tip
Be patient! Allow the jars to sit undisturbed for at least a week before opening. This resting period ensures the brine thoroughly infuses the okra, delivering bold, tangy, and perfectly balanced flavours. For an even richer taste, wait up to two weeks for the flavours to develop.
Creative Variations for Pickled Okra
Spicy Pickled Okra
You can enhance the heat by adding sliced jalapeños or serrano peppers or increasing the amount of red pepper flakes in the brine.
Include a flavour of smoked paprika, chipotle powder, or whole dried chilli for a smoky chili. This adds depth and a unique twist to the pickling profile.
Fermented Pickled Okra
Create a tangy, probiotic-rich variation by fermenting okra in a saltwater brine instead of vinegar.
Allow the jars to sit at room temperature for 5–7 days, opening them (“burping”) daily to release built-up gases from fermentation. The result is a naturally sour and healthful alternative.
Lemon-Dill Pickled Okra
Add thin slices of fresh lemon and sprigs of dill to the jars before pouring the brine.
The lemon’s citrusy brightness pairs perfectly with the tangy brine, while the dill provides a herbaceous, fragrant touch that complements the okra.
Quick-Pickled Okra
Prepare a small batch by pouring hot brine over okra and refrigerating the jars immediately.
Skip the canning process and enjoy the quick-pickled okra within 24–48 hours for a fresh, tangy treat. This method is ideal for those short on time or wanting a small batch.
Pro Tip
Add Colorful Vegetables: Layer okra with slices of carrots, red bell peppers, or radishes to create a vibrant and visually appealing jar. This enhances the and a jars, perfect for gifting or as a standout addition to charcuterie boards and party spreads.
FAQs and Storage Tips for Pickled Okra
FAQs
How long does it take to pickle okra?
The flavours take at least 1 week to develop and infuse into the okra fully.
Can I use frozen okra?
Fresh okra is recommended for the best texture, as frozen okra tends to become mushy during pickling.
How long does pickled okra last?
Refrigerated jars last up to 2 months. Properly canned jars can be stored for up to 1 year in a cool, dark place.
Storage Tips
Canned Jars
Store sealed and processed jars in a cool, dark place such as a pantry or cupboard. This helps maintain the pickled okra’s quality and flavour for up to a year.
Refrigeration
Keep opened jars or non-canned pickled okra in the refrigerator. When properly sealed and stored, refrigerator jars typically last up to two months.
Sterilization
Always use sterilized jars, lids, and tools during preparation to prevent contamination. This step is essential for ensuring the safety and longevity of your pickled okra.
Pro Tip
Label Your Jars: Write the preparation date on the jar lid or a label. This makes it easy to track freshness and ensures you enjoy your pickled okra at its peak flavour. For reference, include an approximate “best by” date for canned jars.
Conclusion
Pickled okra is a simple yet flavorful way to preserve and enjoy the fresh taste of okra all year round. With its crisp texture, tangy brine, and customizable flavours, this versatile recipe is perfect for adding a unique touch to your meals—whether as a snack, a garnish, or a breakfast.
Following this guide, you can create pickled okra tailored to your taste preferences, from spicy and bold to bright and zesty. The process is straightforward, and the results are both satisfying and rewarding.
We’d love to hear about your pickling adventures! Share your creative variations, tips, or questions in the comments below, or tag us with photos of your pickled okra jars on social media. Let’s celebrate the art of pickling together—happy preserving!
Pickled Okra
Ingredients
Main Ingredients:
- 2 pound fresh okra (small, tender pods)
- 4 cups white vinegar (or apple cider vinegar for a sweeter taste)
- 4 cups water
- 2 tbsp pickling salt
- 2 tbsp sugar (optional, for a slightly sweeter brine)
Pickling Spices:
- 6 garlic cloves (1 per jar)
- 2 tsp dill seeds
- 2 tsp mustard seeds
- 1 tsp black peppercorns
- 1 tsp red pepper flakes (optional, for heat)
- 6 sprigs fresh dill
Instructions
Prepare the Okra:
- Wash the okra pods thoroughly under cold water.
- Trim the stems slightly, being careful not to cut into the pods.
Make the Brine:
- Combine vinegar, water, salt, and sugar (if using) in a saucepan.
- Heat over medium heat, stirring until the salt and sugar dissolve.
- Bring the brine to a gentle simmer and then remove from heat.
Pack the Jars:
- Sterilize mason jars by boiling them in water for 10 minutes or running them through the dishwasher on the hottest setting.
- Pack the okra pods upright into the jars, leaving about 1/2 inch of headspace.
- Add 1 garlic clove, 1/3 tsp dill seeds, 1/3 tsp mustard seeds, a pinch of black peppercorns, and a sprig of fresh dill to each jar.
Add the Brine:
- Pour the hot brine over the okra, ensuring the pods are fully submerged.
- Use a clean utensil to release air bubbles by gently pressing around the edges of the jars.
- Wipe the rims of the jars clean, then secure the lids tightly.
Seal and Store:
- For refrigerator pickles: Let the jars cool to room temperature, then refrigerate for at least 24 hours before enjoying.
- For shelf-stable pickles: Process the jars in a boiling water bath for 10 minutes, then store them in a cool, dark place.